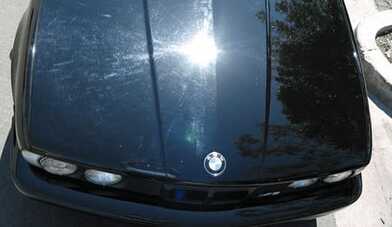
At Huntsville Auto Detailing, our detailing technicians have years of experience providing exterior car detailing and exterior car wash services. Proudly, we examine the car and find damaged areas with 100% accuracy. Taking our time, we get familiar with your vehicle before trying to fix any exterior vehicle issues. We come with a range of specialized equipment and use only the safest, automotive-grade ingredients to clean your car.
The process of restoration of the outside of a vehicle involves a range of steps. Exterior detailing is an involved process that may be preceded by other steps which may be necessary, like denting and paint correction. It involves the identification of problem areas and finding the best ways to fix them. call us today! (256) 253-1280
The process of exterior detailing is highly involved and utilizes a combination of techniques that have been developed on the advice of paint experts. Automotive paint can take a beating, but it can only protect properly if it is supple. A flexible clear coat will repel stone chips as well. To enhance the characteristics, abilities, and general appearance of your car's paint, the following techniques and steps are employed to clean the vehicle: 100% hand wash, clay bar, polishing, waxing, headlight / taillight restoration, and windshield cleaning. |
|
Car washing is a hotly debated topic among gear heads. How do you remove stains? Are jet washes alright? What equipment to use? At Huntsville Auto Detailing, we use the most conservative approach along with the mildest ingredients.
Washing a car is a delicate process, so we use a low-pressure washer. We spray down the entire car, focusing on spots where dust can collect. Cleaning around the wheel arches, removing the sand and dirt slowly. For this step, we try to get water in every nook and crevice of the car’s body.
Then we bring out our touchless washing solution. We attach it to the hose and spray evenly all over the car. The foamy soap immediately begins to slide off the surface. We let it be for a minute or two, allowing the soap to dissolve as much dirt as possible. Then we wash it off. This leaves some areas unclean, so we have to add the next step - the hand wash.
In order to hand wash the car, we need to soap up the car again. But now we bring out our washing mitts. These have thick strands on them, which pull the dirt away from the paint and into the mitt. If we used a washcloth instead, most of the dirt would stay on the surface of the cloth and would scratch the surface of the car. We use the two bucket method - one bucket with soapy water and a grit guard, and the second bucket of clean water to wash the mitt. We start with the top - the roof. That’s the place where dust gets to sit without being disturbed much. The mitt must run back and forth with the line of the car - parallel strokes leave no swirl marks. Even if this method does leave scratches, they’ll be hard to see because they run along the streamlines of the car. These micro scratches will also be easy to conceal with wax.
The soap must be agitated with a light touch to prevent rubbing particulates into the paint. After the entire car is soaped up, we get to the wheels. These get much, much dirtier than the paintwork. Doing them last makes sure the dirty mitt isn’t used on paint. The wheels need to be scrubbed with a hard-bristled brush to clean properly. We run the brush along the sidewall and into the grooves in the sidewall. Alloys are cleaned as well, working with the surface, and as far back as possible. We hose down the entire car after cleaning the wheels and tires.
|
|
|
A clean car isn’t very clean at this point, for impurities are still embedded in the paint. To solve this, we use a clay bar and a spray bottle with a soap solution. The entire car, glass, lights, and paint are rubbed with a soaped-up clay bar. Again, in straight lines. We need to spray soapy water on both the bar as well as the paint, to make sure the surface is nice and wet. This will reduce the chances of particles embedded in the clay scratching the surface. Numerous runs with the clay bar may be necessary before the bar runs clean. With patience, this step is the most effective way to clean the surface properly. The clay bar can pull particulates and bits of dust from the clear coat. After this step, we hose down the car once again. We might also do a touch less wash followed by drying and cleaning with isopropyl alcohol.
Now that we have a clean surface, devoid of impurities and embedded particles, we must make the surface regular. For this, we need to plane it down a bit. We use a detailing power tool, but you can also use a drill with the appropriate foam or wool polishing head. This process can also be done by hand, though it will be more time-consuming. We use a light hand to polish the entire surface of the car, using the same straight-line motion we have been using all through this description.
After going through the entire exterior of the car, we wait for a few minutes for the polish to ‘flash off’, then we use a microfiber towel to remove the excess polish, then follow-up with a second run for problem areas. If you use a power tool for this, you might end up taking off too much clear coat. Use a light hand, and, if you’re a novice or not so sure, use your hands and a polishing pad. You can leave the car as it is now, or remove the polish and put on some wax. For this, do another touch less wash, dry the car, then move to the next step.
After going through the entire exterior of the car, we wait for a few minutes for the polish to ‘flash off’, then we use a microfiber towel to remove the excess polish, then follow-up with a second run for problem areas. If you use a power tool for this, you might end up taking off too much clear coat. Use a light hand, and, if you’re a novice or not so sure, use your hands and a polishing pad. You can leave the car as it is now, or remove the polish and put on some wax. For this, do another touch less wash, dry the car, then move to the next step.
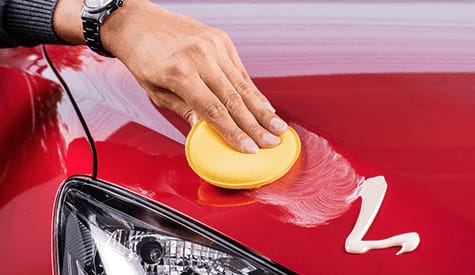
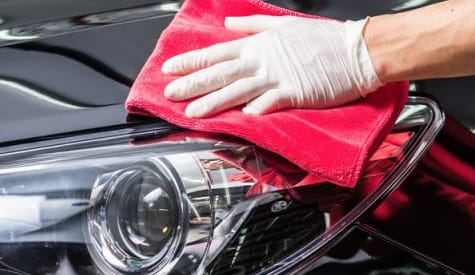
We advise our customers to have their cars waxed three or four times a year. Wax seals and protects paintwork, and prevents headlights and taillights from yellowing with age. There are many different kinds of waxes available these days, but we prefer hard carnauba waxes. Many people like to use liquid waxes because they come off quickly and easily when dry. When it comes to our work, difficult processes are sometimes the best practices. A hard wax may take some elbow grease to shine, but it offers better sealing properties and is more resistant to water.
Most hard waxes come with an applicator pad. Make sure yours is clean before you get to work. A dirty pad is only dirty because it has embedded particulates which will rub against your paint. On an older car which has swirl marks, this process must be done carefully and in small circles. This is the same as what you saw in the movie The Karate Kid. Go in a single direction. Your motive is to fill in the gaps in the clear coat. Don't push the wax into the paint. We do this with a light touch from a firm hand - we don't want to make the scratches worse, but we do want to get as much coverage as possible.
Most hard waxes come with an applicator pad. Make sure yours is clean before you get to work. A dirty pad is only dirty because it has embedded particulates which will rub against your paint. On an older car which has swirl marks, this process must be done carefully and in small circles. This is the same as what you saw in the movie The Karate Kid. Go in a single direction. Your motive is to fill in the gaps in the clear coat. Don't push the wax into the paint. We do this with a light touch from a firm hand - we don't want to make the scratches worse, but we do want to get as much coverage as possible.
When waxing a new car, you must never work in circles. Go in straight lines alongside the bodywork of the car. We start with the roof so that it is completely dry by the time other areas have been done. Also, we try to make sure we don't wax a car when the sun is beating down on it. The paint should be cool for this to work properly. Why? One reason is that when the paint is hot, the scratches on the surface expand a little. When you push the wax into those spaces, too much of it gets in there. Then, when the car cools off at night, the hard wax will deform the clear coat and reduce its protective abilities. Wax isn't clear like the clear coat. A little of it makes the scratches invisible. A lot of it makes them more visible.
Many people ignore some hard-to-reach areas, like the bottom of the frame, right below the doors, as well as the bottom part of the doors themselves. These are areas where water gets in when you're driving in the rain. That's why they need to be protected with wax, too. The bottom of the car is a hotspot for rust. This is the actual frame of the car - not just a metal panel. It's important for structural integrity. That's why you have to protect this bit of the car. We get down there and inspect for rust issues. For minor rust, a bit of paint correction is all the car needs. A rusted frame will need to be cut and welded and then reapplied with primer, paint, and clear coat.
We apply the wax and wait for a few minutes until it 'flashes off' or becomes more opaque than before. You know the wax is ready to be taken off by rubbing a finger on the paint. If the wax comes off clean and leaves a dry surface underneath, you know it is ready to be taken off. We use microfiber towels for this, though it is okay to use a regular cloth as well. Finish it off with a final buff with a microfiber towel, and you're good to go.
Yellowed headlamps and taillamps really bring down the look of a car. They make the car look neglected. Different cars have different rates of headlight yellowing. The top surface of the plastic, after years of exposure to the sun and rain and pollution, becomes amorphous and cloudy. Some plastics are more prone to this than others, but as a general rule, a headlight which is never waxed or protected in any way, on a car which is stored outside, will become yellow in a few years.
How do you fix that? Headlamp restoration is another labor-intensive, detail-oriented process. It essentially involves erosion of the top surface of the plastic to remove the yellow, then a lot of polishing to make it clear again. We begin with isolating the area with tape, then wet sanding the plastic with a mildly abrasive sand paper. We go in straight lines, starting from the top, then going to the bottom. You might notice that the top is more yellow than the bottom. This is because of the way the sun beats down on the car. Only take off as much material as is necessary.
Then we clean the headlamp with soap solution and a paper towel. After this step, we wet sand it again with progressively higher grit sandpaper, cleaning every time a different grit sandpaper is used. We go up to 3000-grit, though you can go all the way up to 5000 and 6000 grit for a better finish. With this step done, we clean the headlight again with some isopropyl alcohol.
Now comes the polishing bit. You can always go another swipe with a clay bar to remove surface particulates. The polishing step enhances the surface finish more quickly and effectively than using a higher grit sandpaper. We wash it off, apply some wax, and your headlights look brand new.
Cleaning glass is different from cleaning paintwork. The surface hardness of glass is much higher than clearcoat. Also, scratches on the windshield have an additional problem - wipers. An older car's windshield will not only have swirl marks, but also cuts from where a dirty windshield wiper ran on it. Most people never clean their wiper blades and this can be a pretty big issue that may need a lot of polishing to fix.
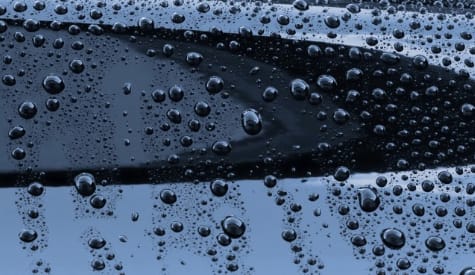
We use an automotive-grade glass cleaner to clean the surface. Then we do a wet clay-bar of the windshield, going in circles as well as straight lines. After this, we apply a layer of polish with a polishing power tool, going back and forth for a bit, focusing on deep scratch areas. Then a quick wash and dry, and a layer of wax to seal the surface and give it some hydrophobic properties.
We use an automotive-grade glass cleaner to clean the surface. Then we do a wet clay-bar of the windshield, going in circles as well as straight lines. After this, we apply a layer of polish with a polishing power tool, going back and forth for a bit, focusing on deep scratch areas. Then a quick wash and dry, and a layer of wax to seal the surface and give it some hydrophobic properties.